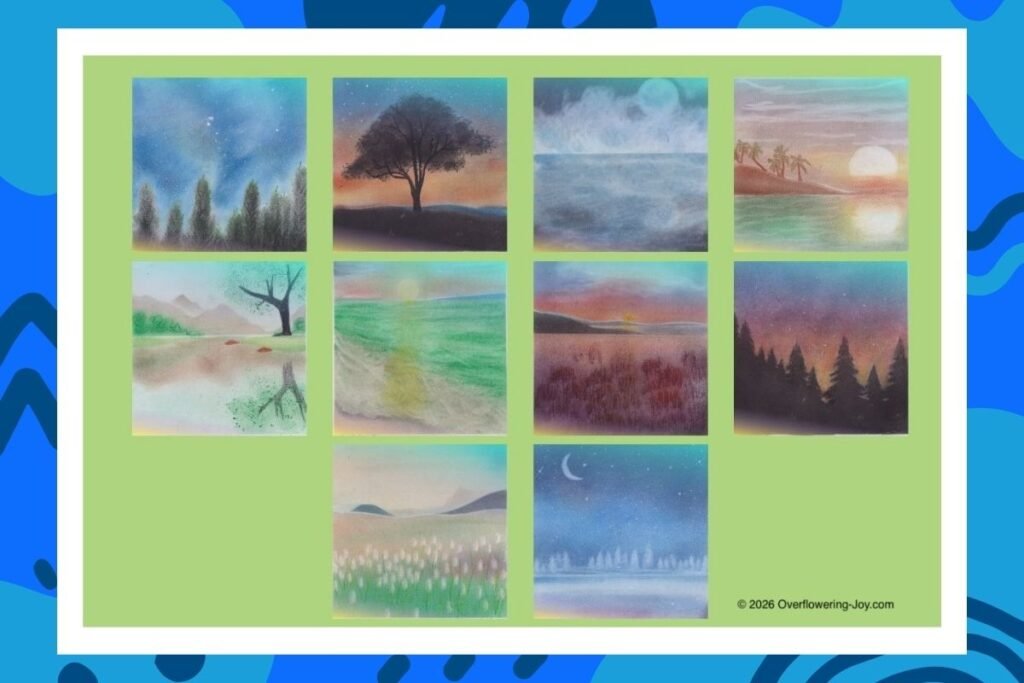
Soft Crayon Art is more than just a form of creative expression—it is a gentle and therapeutic activity that nurtures the mind, body, and spirit. Using soft pastel colours and simple finger-blending techniques, participants can create beautiful, harmonious artworks regardless of their artistic experience.
The process of applying and blending colours with the fingertips encourages us to slow down and focus on the present moment. As the colours are gently spread across the paper, the mind becomes calmer, worries begin to fade, and a sense of peace emerges. This mindful engagement can help reduce stress and anxiety, making Soft Crayon Art a relaxing and enjoyable activity for people of all ages.
Soft Crayon Art is also deeply comforting. The soft colours, gentle movements, and non-judgmental approach create a welcoming space for self-expression. There is no pressure to achieve perfection; instead, participants are invited to enjoy the creative journey, allowing their thoughts and emotions to flow naturally onto the paper. Many find the experience soothing, uplifting, and refreshing, bringing renewed joy and inner balance.
The healing qualities of Soft Crayon Art lie in its ability to connect us with our emotions in a gentle and positive way. Through colours and simple imagery, feelings that may be difficult to express in words can find a voice. The creative process often inspires reflection, gratitude, and hope, helping to strengthen emotional well-being and resilience.
Whether enjoyed individually or in a group setting, Soft Crayon Art fosters a sense of calm, connection, and encouragement. It reminds us that beauty can emerge from simple moments and that taking time to create can be a meaningful form of self-care. Through its therapeutic, relaxing, comforting, and healing qualities, Soft Crayon Art offers a pathway to greater peace, mindfulness, and emotional wellness.
Materials Needed
- Soft pastels blocks
- Eraser (to remove unwanted areas and to create shapes)
- Card stock at least 250g, recommended card size 150mm x 150mm
- Drawing board or flat surface
- Tissue paper or cotton pad
- Masking tape (for taping a 10mm border around the card)
- Stencil shapes (optional), or make your own shapes
- White pastel for highlights
- Pastel pencils (optional)
- Fixative spray (to seal the artwork)
Steps
Step 1: Prepare Your Heart and Workspace
Begins with a peaceful mindset.
- Prepare a clean and comfortable workspace.
- Take a moment to relax and enjoy the creative process.
- Do not worry about making a “perfect” picture.
- Allow the colours and shapes to express your feelings.
Step 2: Choose Your Theme
Select a simple and meaningful subject.
Nature themes:
- Sunrise or sunset
- Flowers and gardens
- Mountains and rivers
- Trees and forests
- Animals
- Seasons
- Moments of gratitude and joy
For faith-based themes:
- God’s creation
- The cross under a sunrise
- A peaceful prayer garden
- A child walking with Jesus
Step 3: Create Soft Shapes
Cutout simple shapes to build your picture.
Common techniques include:
Circle Shapes
Create:
- Sun
- Moon
- Flowers
- Fruits
Finger Blending
Create:
- Clouds
- Water
- Hills
- Light effects
Stencils (optional)
Create:
- Leaves
- Animals
- Hearts
- Decorative patterns
Step 4: Create the Background
Begin with the largest area first.
Examples:
- Sky
- Sea
- Grass
- Mountains
Technique:
- Tape cutout shape on stock card
- Scrape a small amount of pastel onto your card stock.
- Use your finger to gently rub pastel powder over the desired shape.
- Blend using gentle circular movements.
- Layer colours slowly.
- Repeat change shape or use back shape for the other areas to form your artwork.
Blending example:
- Blue + brown → textured sky
- Yellow + orange → warm sunlight
- Green + yellow → fresh grass
Step 5: Add the Main Subject
Place your main focus gently into the artwork.
Examples:
- A large tree
- A flower
- A bird
- A person
- A house
Keep the shapes simple and child-like. Preferably artwork to be warmth over realism.
Step 6: Add Light and Highlights
Eraser (or if you prefer White pastel) is often used to create softness by removing and exposing white surface..
Add:
- Sun rays
- Sparkling water
- Flower highlights
- Stars
- Clouds
Blend lightly so the picture feels gentle.
Step 7: Add Fine Details
Use pastel pencils or small pastel pieces for details.
Examples:
- Flower stems
- Birds in the sky
- Grass
- Leaves
- Small patterns
Do not overcrowd the artwork. Leave space for peace and imagination.
Step 8: Balance the Artwork
- Sun rays
- Sparkling water
- Flower highlights
- Stars
- Clouds
Step back and observe:
Ask:
- Does the picture feel peaceful?
- Are the colours harmonious?
- Is the main subject clear?
- Does it bring joy or comfort?
Adjust by adding or softening colours.
Step 9: Complete and Preserve
Mount or frame or store (in album) the artwork.
Gently remove any loose pastel dust.
Gently remove masking tape (for border)
Spray with fixative if desired.
Mount or frame or store (in album) the artwork.